YZ250 CLEANING ACCESSORIES
A group of accessories aimed at making cleaning my dirtbike easier and safer.
Creating a functional 3D printed lid for the holes that should be covered when washing the bike - the exhaust and air box. Additionally, a cover is needed to block particles from falling into the carburetor while cleaning the air filter. Designing a solution to solve the inefficiencies while cleaning the air filter such as not being cleaned properly and not having an appropriate area to dry the filter.
Research & Discovery
Understand the problem and the target audience. How does the user want to use the product. Analyse competitor benchmarks and trend insights.

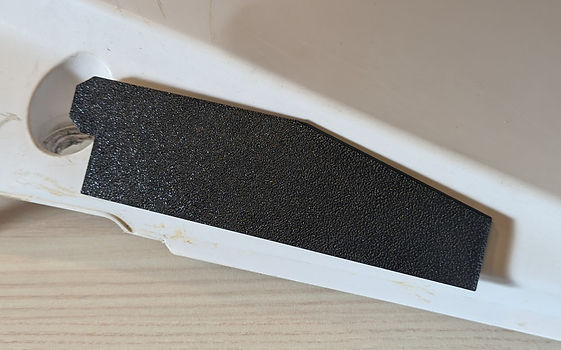
First, keep it simple with a basic exhaust plug to prevent corrosion on the pipe's interior caused by water leaking in during washing.
Most of the pre-existing plugs are designed with methods for using less plastic, however, due to the 3D printing method I will be using for production, a lower infill density will allow me to conserve material. Additionally, I can design the plug to be the exact size, reducing the total size necessary.

Secondly, designing a method for blocking the air intake holes during washing.
I am unable to find an equivalent solution so starting from scratch to create something that will plug and cover the hole.

Additionally, recreating and designing improvements on an existing product - an airbox assembly case cover that screws into place with the OEM winged bolt.
Working from this basic design and incorporating more user-friendly features will test my ability to create something to fit existing hardware.

Lastly, I will create an elevated platform to place in the bucket of kerosene, while cleaning my air filter.
An elevated platform will allow the sediment to sink to the bottom, below the platform, keeping the remaining fluid relatively clean and preventing the cleaned filter from touching the dirt and debris at the base. Additionally, it will double as a drying rack for the clean filter.
Define Requirements
Set goals, objectives, and deliverables. Gather constraints (eg. budget, time, technology)
Exhaust Plug - 3D printable, compact, effective, user-friendly.
Air Intake Plug - 3D printable, effective, user-friendly.
Air Intake Cover - 3D printable, effective, user-friendly.
Sediment Separator - Repurposed material, user-friendly, multipurpose.
Ideation

Brainstorm ideas and concepts. Sketch or wireframe potential solutions.
Exhaust Plug

Plug
Handle
Air Intake Plug
Tiered Plug

Cover
Air Intake Cover
Sediment Separator
Concept Development
Choose the best ideas to develop further. Refine the concept with feedback from stakeholders.
Plug
Handle
Exhaust Plug
Shorten to reduce material use.
Increase ergonomics.

Design the assembly to have feet at the base to elevate it from the bottom of the bucket. It should have a solid mesh pass through to allow the new sediment to sink through the elevated platform. Oonce the filter is clean there should be hooks that will extend out from the platform and be able to hook onto the top of the bucket creating a new elevation, out of the cleaning solution. This will allow the air filter to dry while dripping the kerosene mix back into the bucket. All of this needs to be facilitated without any sharp edges as this will rip the delicate air filters
Air Intake Plug

Creating and testing CAD model seal.


Refined.
Design
Create high-fidelity designs. Develop high-quality prototypes or mockups with high standards. Implement specific materials and finishes. The original vision must remain the same from concept to production
Review & Feedback
Validate the final form by testing every feature and use case. Present the design for feedback from stakeholders. Iterate and adjust based on input.
Finalisation
Finalilse design assets and documentation. Prepare for implementation or production,
Testing & Validation
Test design with users or in real-world scenarios. Collect feedback for improvements.
ChatGPT Design Structure 1. Research & Understand the RequirementsPurpose: The primary function of the knock box is to safely hold and dispose of used coffee grounds by using a "knock bar" or "rod" to dislodge the grounds from your portafilter.Material Requirements: You need a durable material that can withstand the impact of knocking and is easy to clean. PLA is commonly used in 3D printing but may wear out quicker than other materials like PETG or ABS, which are more durable.Size & Capacity: Make sure the box is large enough to hold the grounds of multiple shots of espresso. Generally, the box should be able to hold enough grounds from several shots of coffee (around 10-15 shots).Knock Bar Design: The bar should be able to withstand constant use without breaking, and the box should be designed so the bar is positioned at the right height for comfortable use.2. Sketch & Conceptualize Your DesignDimensions: Take measurements of the espresso portafilter (the size of the group head) and your countertop space. This will inform the size of the knock box.Height: The height should be sufficient to allow you to comfortably knock the portafilter against the bar without causing strain.Width/Depth: Consider how much space you have available and how many grounds you typically need to dispose of at a time.Knock Bar: The knock bar is a critical component. You'll need to design a rod or cylindrical bar that fits securely inside the box but can also be knocked against without coming loose.Materials: Although you're 3D printing, you might want to consider a mix of 3D printed parts and metal or rubber parts for extra durability. For example, the knock bar could be made of metal with 3D printed parts for the frame.3. Plan for 3D Printing ConsiderationsPrintable Parts: Keep in mind that most consumer 3D printers have size limitations. Ensure the parts (box and knock bar) are small enough to fit within the build volume of most printers, or plan for modular pieces that can be assembled.Assembly: Design the box so it can be assembled easily. It may be helpful to design the knock bar as a separate, removable component, allowing users to swap it out if it wears out over time.4. Start 3D ModelingUse 3D modeling software such as Fusion 360, Tinkercad, SolidWorks, or Blender to begin designing.Create the box: Start with the basic shape (a cylindrical or square base is typical). Add the features such as:Base: Design a flat, stable base that can withstand knocks without moving.Walls: Create the walls of the box, ensuring they are thick enough to hold up to repeated impacts but not so thick that they waste filament. Consider adding small fillets to avoid sharp corners, which are harder to print and can be a safety hazard.Knock Bar Holder: Design slots or holes to secure the knock bar in place. Ensure it's easy to insert or remove, but snug enough to avoid shifting during use.Knock Bar: Design the knock bar to fit the dimensions of the box. Depending on your printer, you may print the bar as a separate piece or design it to be integrated with the box. Make sure it's strong enough for repeated use.Draining/Spillage Features: Add a small hole or grooves at the bottom of the box to help liquid drain out and prevent grounds from accumulating at the base.Customization: Leave space for optional rubber feet, or design grooves for these feet to help stabilize the box on countertops.5. Ensure PrintabilityWall Thickness & Print Settings: Set the wall thickness to at least 3-4 mm for strength. Use a higher infill percentage (50%-100%) to ensure the parts are sturdy enough for use.Supports: Consider whether any parts of the design will need support structures when printing (e.g., overhangs or the knock bar’s holder). Test the design for optimal print orientation.Overhangs: Be mindful of overhangs when designing. Ensure no part of the design requires an excessive amount of support material to print.6. Prototype and Test3D Print a Prototype: Print a first prototype of your knock box using your chosen material (PLA, PETG, ABS, etc.).Testing: After printing, test the box's functionality:Is the knock bar stable and durable?Is the box large enough to hold the used grounds from several shots?Is the design comfortable to use?Check for ease of cleaning and drainage.Iteration: Based on your test results, you may need to tweak the design for better functionality, comfort, or durability. Common adjustments include:Strengthening the knock bar area.Adjusting the box's height or dimensions.Adding rubber feet or a more secure bottom.Modifying the drainage hole size to prevent clogs.7. Prepare for Open-Source SharingOrganize Files: Once you’re satisfied with your design, export the STL or OBJ files for each part of the design. Organize them into clearly named folders so users can easily understand what to print.License Your Design: Choose an open-source license for your design. A Creative Commons license (e.g., CC BY-SA) is commonly used for open hardware and design projects. This will allow others to use, modify, and even improve your design, as long as they give you credit.Document the Design: Create a simple guide or README file explaining how to print the knock box and how to assemble it. Include print settings, recommended materials, and any troubleshooting tips.8. Share the FilesPlatform: Upload the design files to a platform like Thingiverse, MyMiniFactory, or PrusaPrinters for easy access and sharing. Make sure to include clear instructions and images of the final product.Community Engagement: Share your design on relevant online communities like Reddit’s r/espresso, r/3Dprinting, or specialized coffee forums to help spread the word.Feedback and Iteration: Encourage feedback and suggestions from the community, and be open to making improvements based on user experiences.9. Continuous ImprovementMonitor Feedback: Once others start printing your knock box, monitor their feedback for any potential design flaws or improvements. Update the design files as needed based on the feedback to make your project even better.Refinement: As you use the knock box yourself, you may come up with ideas for additional features or design changes (e.g., adding a lid, custom engravings, etc.).